Outline a Book with Scene Index Cards: 4 Stage Workflow
Bella Rose Emmorey
book editor, rogue behaviorist, digital marketer, writer, brand builder, plant aunt, and cheese enthusiast.
Are you a visual person? You need to see what you’re working on in order to get all the brain juices flowing? Then you will probably benefit from learning how to outline a book with scene index cards.
Some people can outline in a Google Doc and get away with it. Others, not so much.
Using scene index cards to outline is helpful for so many reasons, chief among them being the ability to shuffle ideas around and visually see the primary beats of your story before filling the gaps.
And if you’re not sold yet, just think about whether or not you’ve had success with other methods. You’re here, seeking yet another way to outline. Give it a shot.
I’ve got a 4-stage workflow to use if you’re a complete newbie + a little prep list.
Prepping to Outline a Book with Scene Index Cards
You need a reliable space where these cards won’t be bothered, moved around, or lost. Whether you have pets, siblings, kids, or a clumsy partner, find a space that you can use consistently, and that you can leave alone.
Technically, there are two options for this. One uses index cards, the other uses "index cards".
Setting Up Your Space: Physical
Real index cards are handy to use $ when outlining$ . Some of us need to feel a physical something to get creative. But you also run the risk of not securing the outline.
Either way, for this you’ll need:
- A board, poster, or flat wall
- Index cards
- Tape
- 3 colored markers
You can either work on a flat surface (no need for tape) or situate your base vertically.
Setting Up Your Space: Virtual
AKA, through a software, which will save and keep all your progress.
For this, you’ll need:
- Digital device (computer, phone, tablet)
- Internet connection (usually)
- Software of your choice
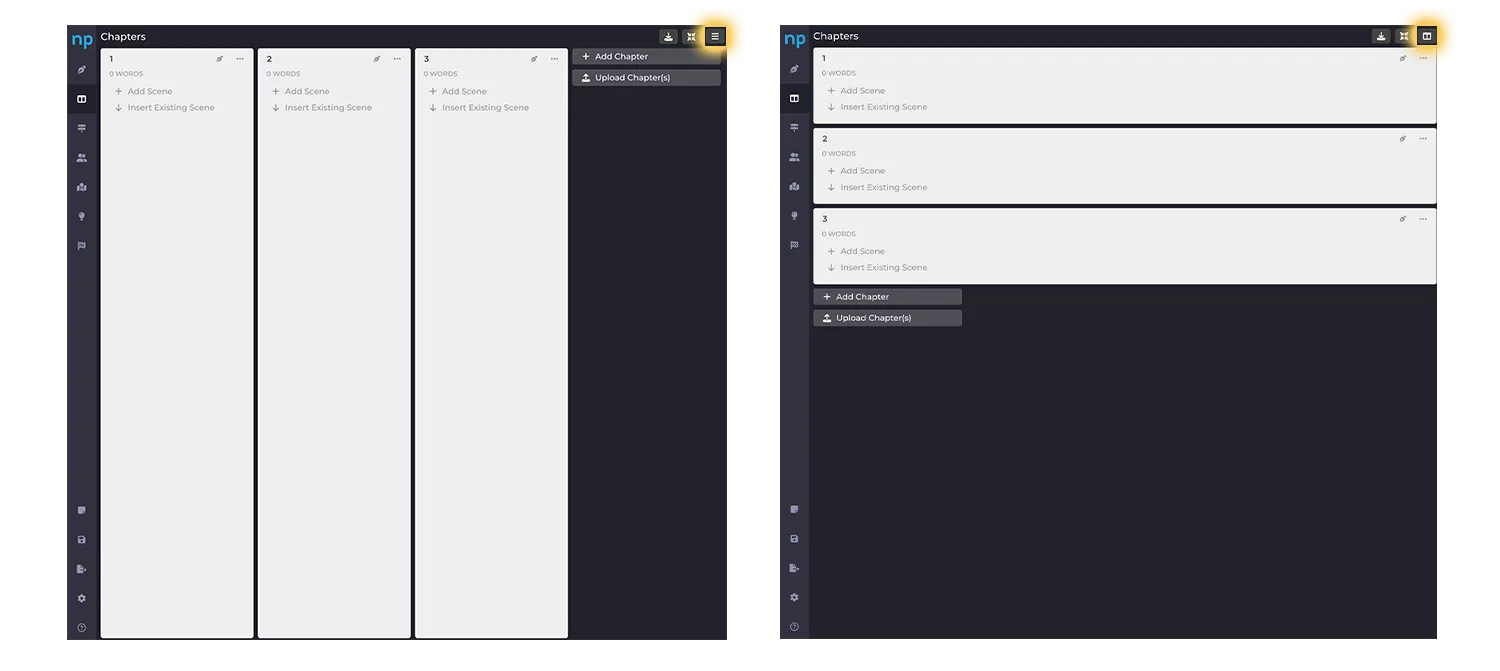
I recommend a software that gives you a good visual option, something more than a word processor. NovelPad is great for this specifically because you also get to choose between types of layouts, like rows or columns:
Plus, you can use $ scene cards in NovelPad$ to save yourself the hassle of filling out index cards by hand. More on that later.
Either way, choose a software that’ll actually save your work and not lose it.
Once you’ve set up your space, we’ll start with the first stage.
Stage 1: Determine Core Scenes
This strategy is similar to the $ Snowflake Method$ . The idea is to start with the big-picture items first.
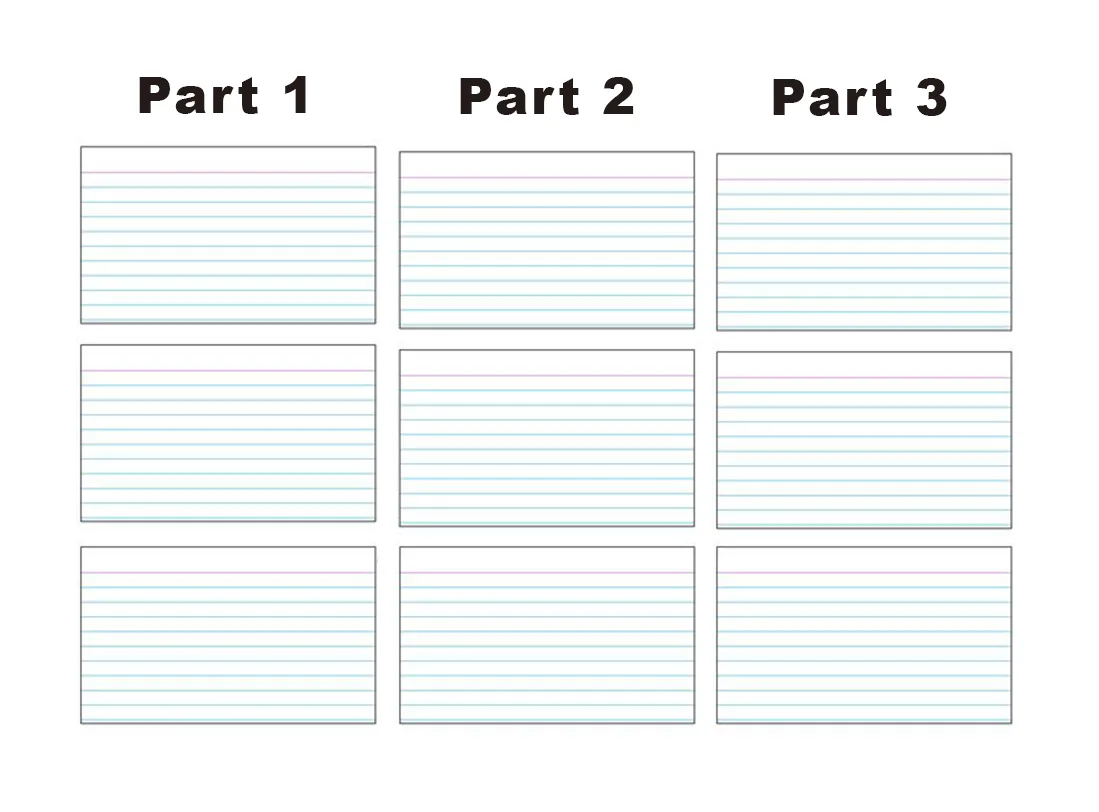
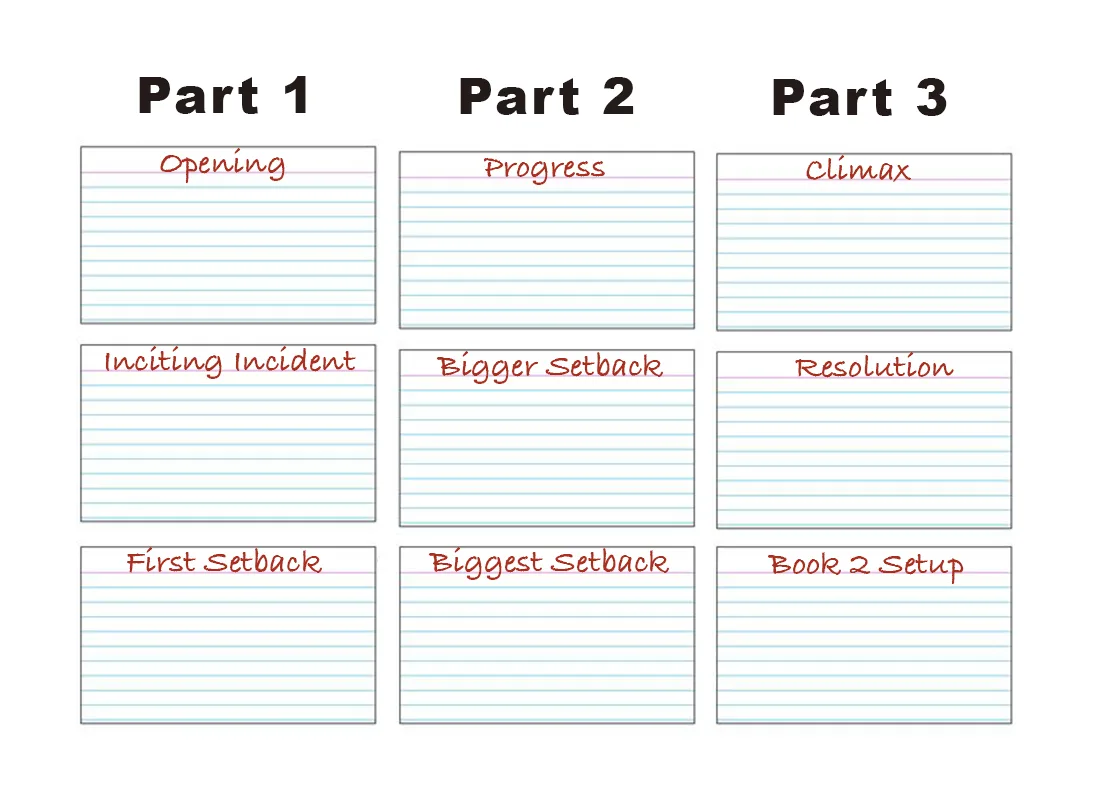
First thing’s first: prep your index cards or scene cards in your software so they’re in three parts, like so:
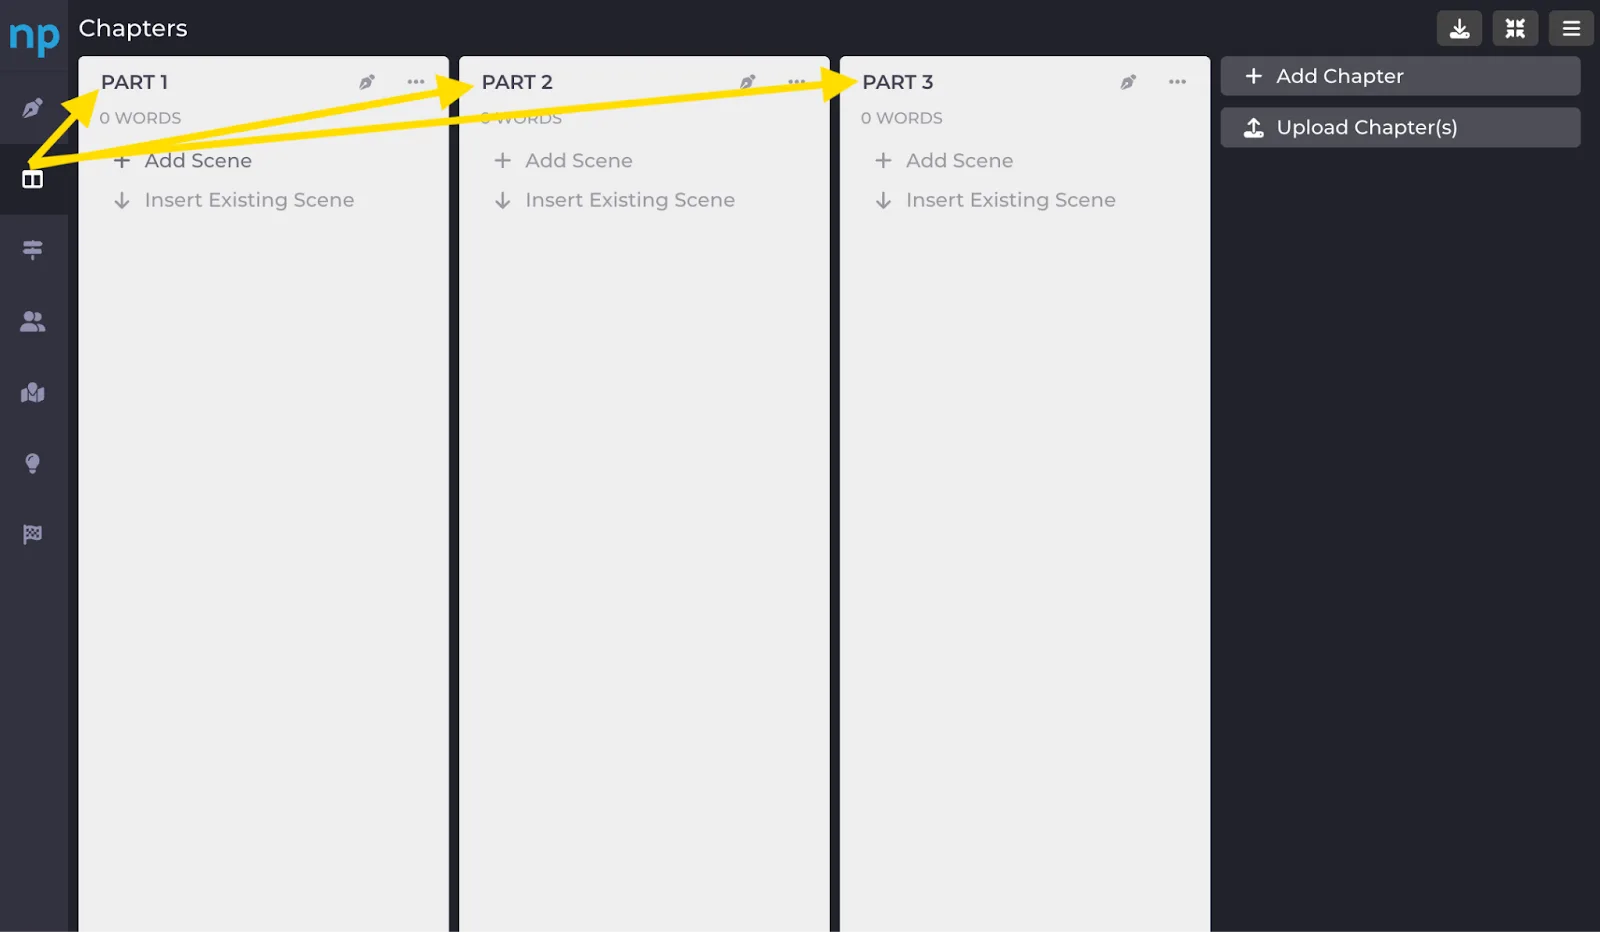
Or like this:
From there, you’ll create a scene card for each of the core scenes in the story, as follows.
Part 1:
- Opening
- Inciting Incident
- First Setback
Part 2:
- Moment of progress (first big win)
- Bigger Setback
- Biggest Setback
Part 3:
- Climax
- Resolution
- Book 2 setup (optional)
Place these at the appropriate parts in the book, which will end up looking like this:
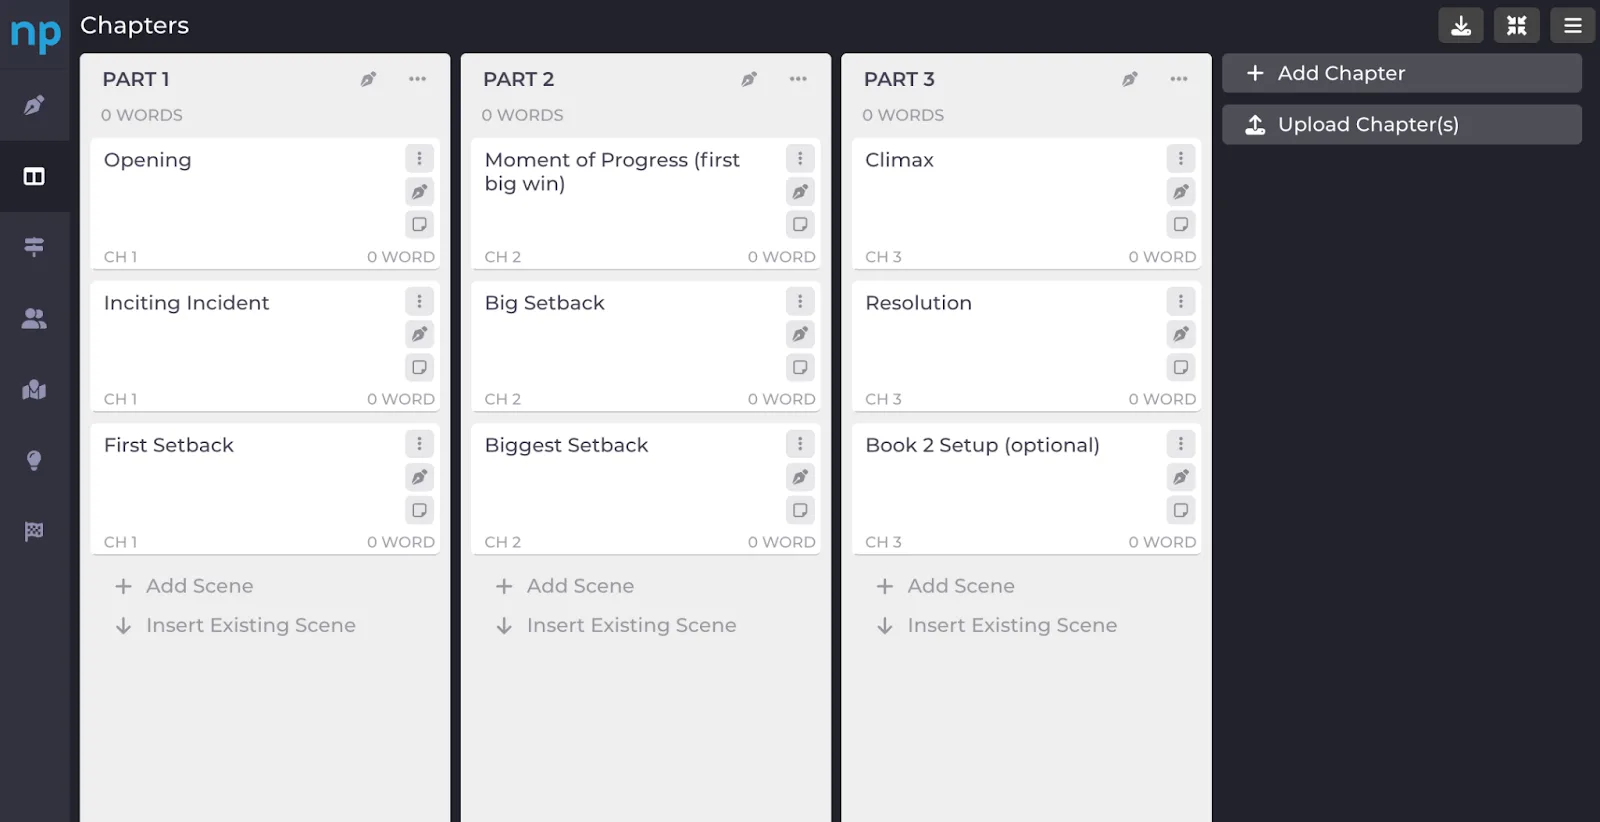
Or like this:
I recommend writing the card titles in different colors than the body text, if you're using physical cards.
Then, you’ll want to actually write what happens at each phase. This is simplistic for a reason. We’ll fill in more details later. You’re really just giving yourself a brief overview of the main thing that happens during these core scenes.
Just remember that these core moments are what move the story along. Write down as much as you can on the top of the card, with details on the back. Or when you fill them in on a software, you might have something that looks like this:

Stage 2: Fill in Events Between Scenes
A lot can happen between the inciting incident and the first setback. Specifically, the main character will meet a lot of people, likely develop allies, possibly make a few enemies.
You want to think about the character’s overall arc and development too. How can you balance moving the plot forward, utilizing subplots, and connecting both to the character’s growth?
Between scenes, use variations of these:
- Personal challenge causes plot failure or hesitation
- Something goes wrong with the plan
- An unexpected intrusion takes place
- Character does everything right, but antagonist thought ahead
- Things have gone exactly to plan–yay!
- Devising a plan
- A betrayal happened
The goal is to create a sense of progression, while still introducing conflict that leads to the next core scene.
Create a scene card for these events so you can see the plot in more detail.
This is what you might end up with:
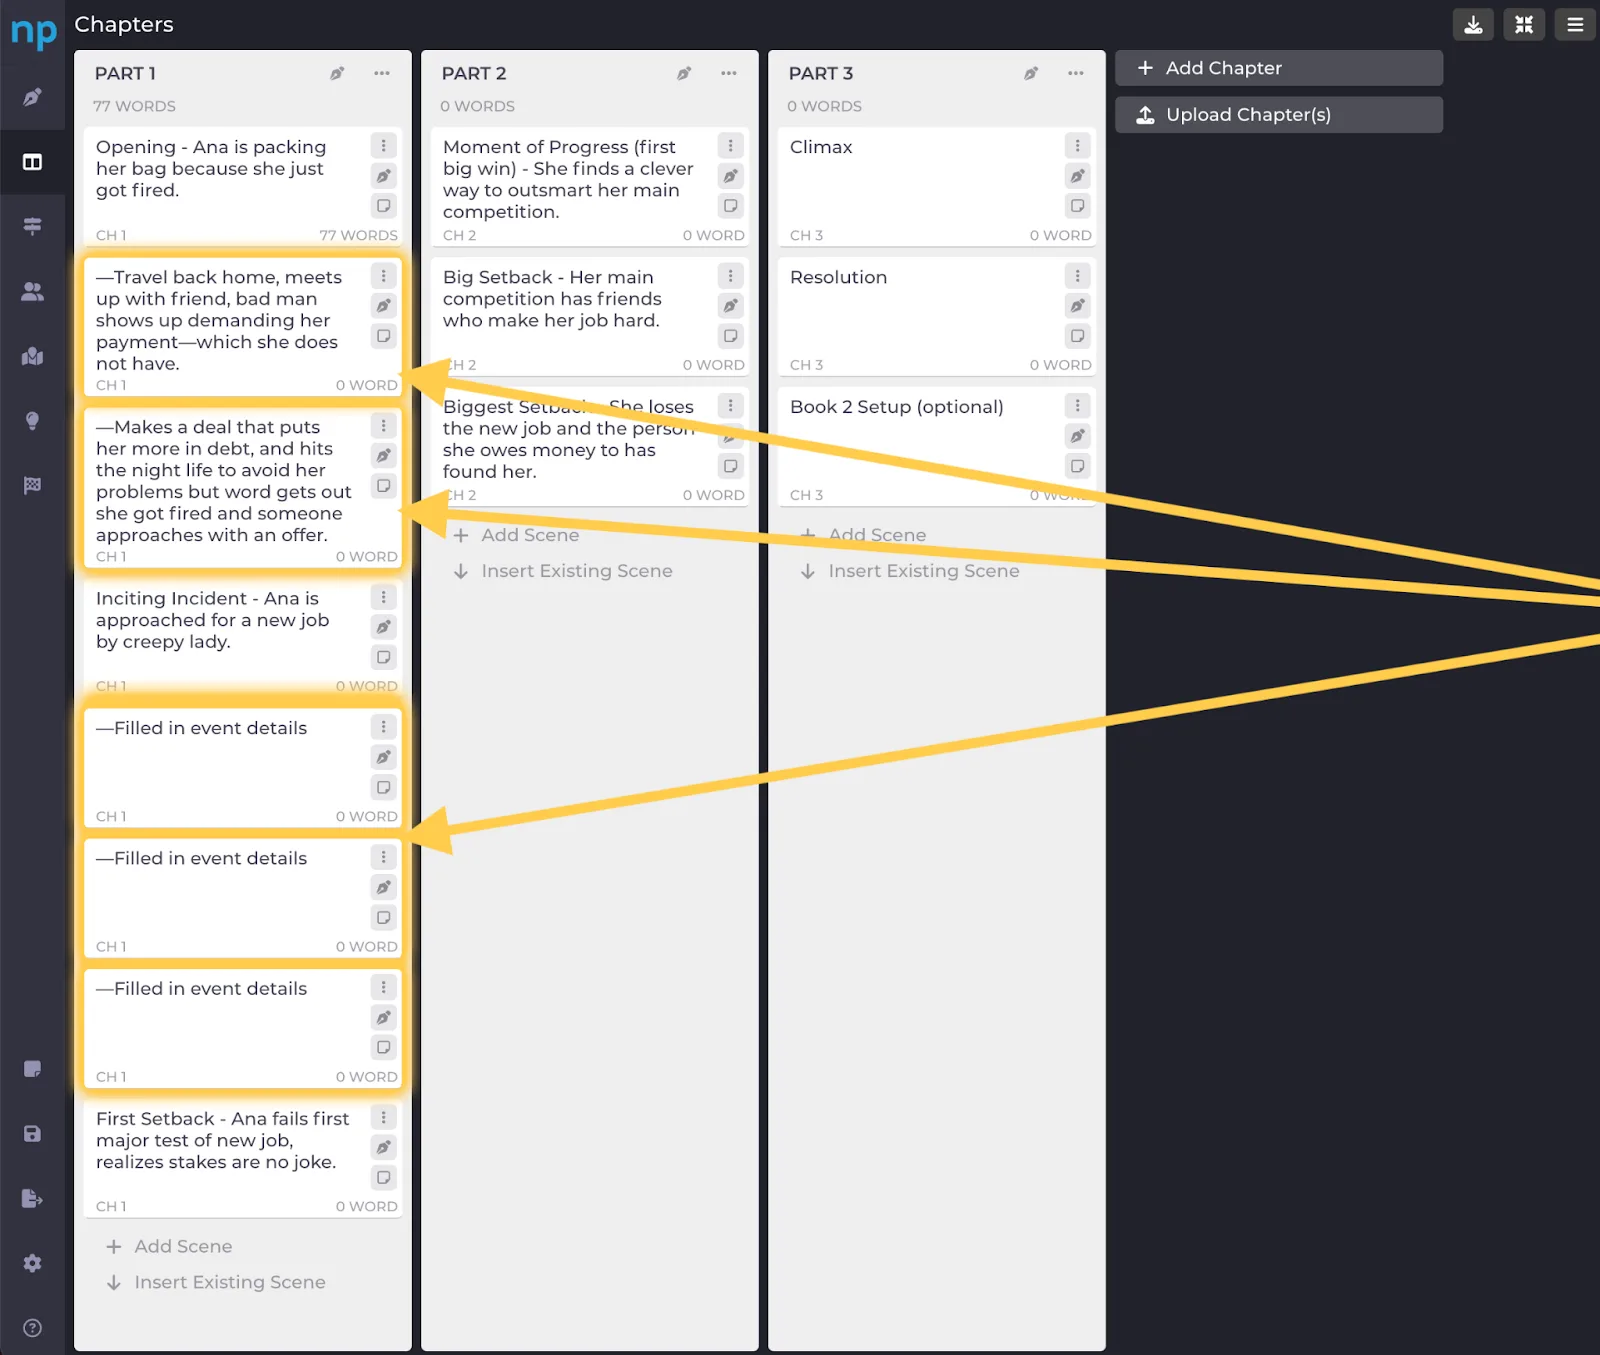
If you’re using physical scene index cards to do this with, use a different colored marker to determine them as "filling in" events. For software like NovelPad, you can simply add asterisks or an em dash, as pictured here, or utilize their $ color label system$ .
This helps these parts stand out so you can see the structure of the story easier.
Stage 3: Connect Scenes for Flow
Depending on where you fall on the $ free-writing-to-outlining spectrum$ , you might be able to skip to the next stage. Many people will have enough to work with already, if they have more of a free-writing style.
If you’re a full outliner, these little details often make up the "in between" pieces of a story. These are usually subplot scenes, information, and anything important that needs to happen for the main plot to make sense.
Now is a good time to do that!
What you want to focus on here is this:
- Any pertinent pieces of information you want the reader to know
- Tone or mood of scenes
- Locations of where the scene should take place
- Key characters who need to be present
- Timeline
- Foreshadowing elements
- Character’s intentions (if different from what we see on page)
- Any notes for you as the author
You’ll also want to take time to account for a few details that you can either write on the backside of the index card, or just $ label accordingly$ if you’re using something like NovelPad, which might look like this:
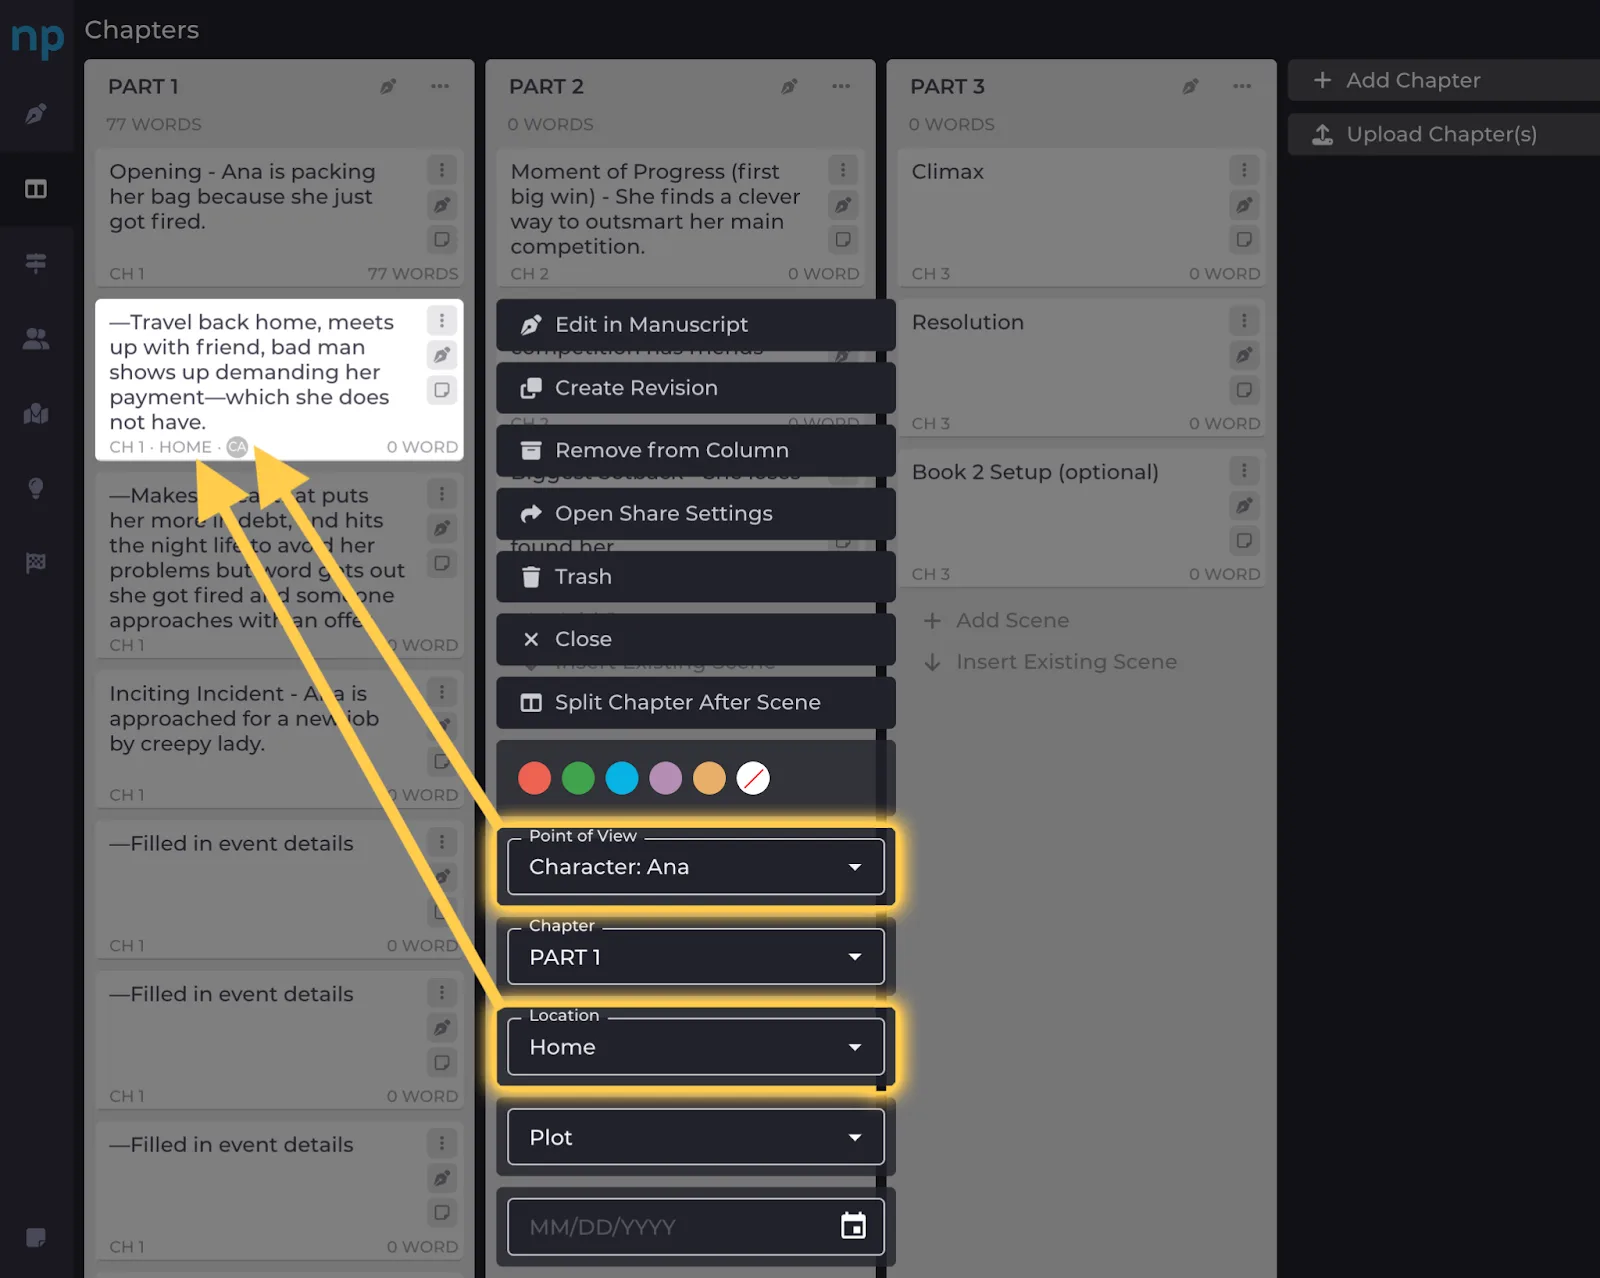
Stage 4: Separate into Chapters
Your outline should be in a few specific blocks right now, with a good progression from beginning to end. But now it’s time to separate these scenes into chapters!
Instead of having the "part" at the top, you’ll now make groupings of scenes that go in each chapter. For physical index cards, you can just take labels and insert them before each chapter.
For a software like NovelPad, you’ll click "$ Add Chapter$ " and number the heading. Click and drag scenes over according to when the best time to break up a chapter is. Keep in mind, you may decide to end a chapter in the middle of a scene when writing, and that’s okay!
As long as your chapters progress with elements of the characters' want, an obstacle to getting what they want, and them taking action toward solving it, your chapter structure will be fine.
This is just to give you a rough estimate anyway.
You’ll end up with something like this:
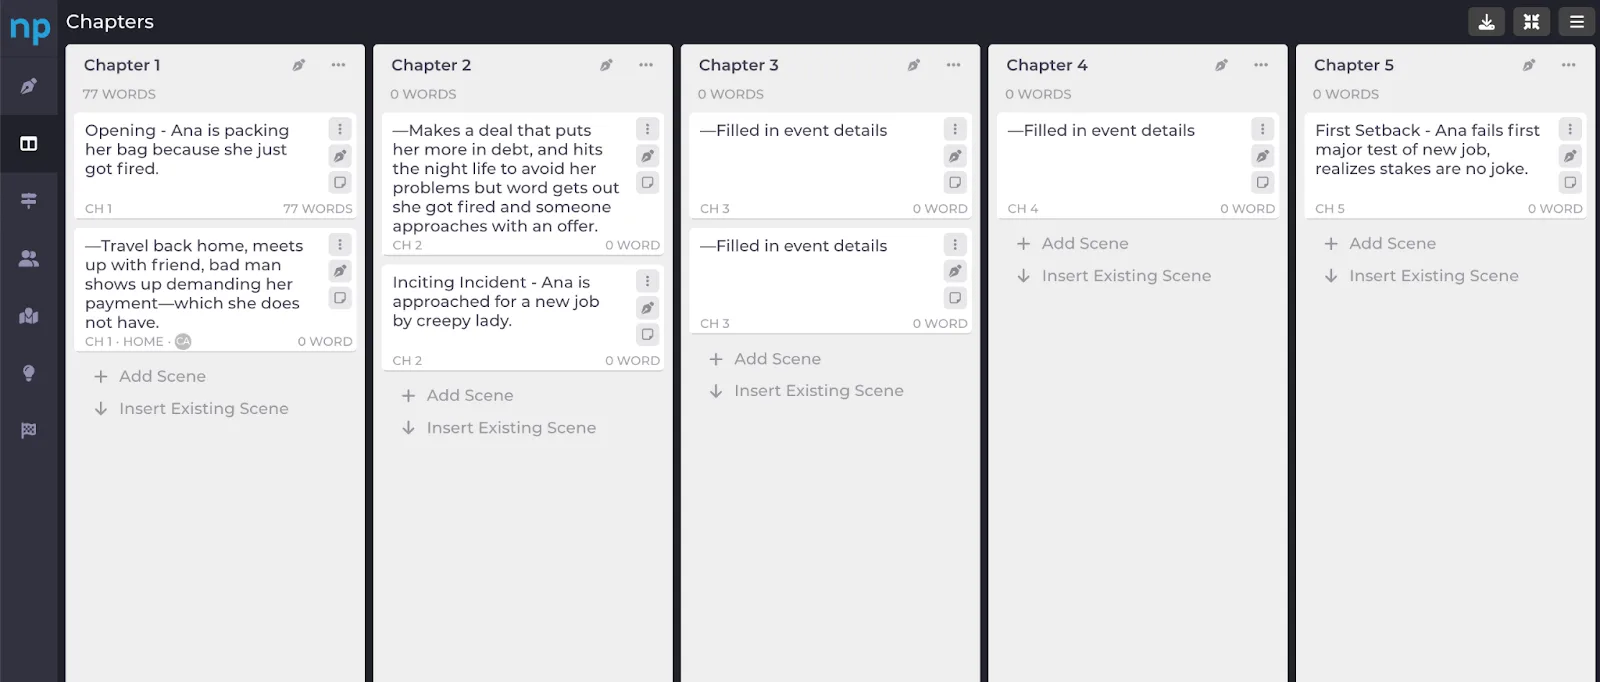
Remember that you can move all of this around! If there needs to be more that happens before the inciting incident, just drag the scene card back over. Keep doing this until you have a structure that makes sense.
If you’re using a software, it’ll just save in this order.
When using physical scene index cards, take a picture! Do not rely on just leaving it there, even if you think it’s secure. You’ll thank me later.
Tips for Outlining a Book with Scene Index Cards
If you’re looking for a few more ways to streamline this process, keep these in mind:
- Check for Balance: Ensure each part has a proportionate number of scenes. Part 2 is often the longest, and should have the most progression between core scenes to keep up the pace.
- Identify Gaps: Look for any missing scenes or transitions and create new cards to fill those gaps. Are you missing context? Is there a good balance of plot and character advancement?
- Review and Revise: Read through the cards to ensure the storyline makes sense. Adjust the order and details as necessary. You should feel like you’re reading a longer synopsis of an actual story. If certain places feel too rushed, or too much happens, adjust accordingly.
- Final Outline: Once satisfied, transfer the scene descriptions into a detailed outline or directly into your writing software.
If you’re ready to start outlining now, $ sign up with NovelPad$ to skip the school supply trip and prep work of physical index cards. Plus, it’ll all be saved as you go! You’ve already got all this momentum, may as well start now.
Like what you're reading?
Join other authors like you in NovelPad’s free writing community!
Join the communitySimilar Posts

What File Formats are Accepted by Kindle Direct Publishing?
File types for ebooks, paperbacks, and hardbacks on Amazon's KDP.
Ollie Ander
Is probably just a couple cats in a trench-coat—the hair shedding and sunlight napping are highly suspect.
How To Write Strong Atmosphere In Stories
7 best tips for creating strong atmosphere in your writing.
Hannah Lee Kidder
NovelPad Author
When is the best time to publish a romance novel?
What is the best month and day of the week to publish a romance? Do romance novelists make money?
Rina Fontes Malka
A writer with too many ideas and not enough time.
How long is a Science Fiction Book?
How many words, chapters, and pages should be in your sci-fi novel?
Ollie Ander
Is probably just a couple cats in a trench-coat—the hair shedding and sunlight napping are highly suspect.
When is the best time to publish a horror novel? [Peak Sales Method]
Make the most of your horror book launch by strategizing with these tips.
Bella Rose Emmorey
book editor, rogue behaviorist, digital marketer, writer, brand builder, plant aunt, and cheese enthusiast.
How long is a fantasy book? Words, pages, chapters, scenes, & prologues
What should wordcount goals look like for a fantasy novel?
S.R. Beaston
Crafty with words, wit, and wisdom, just add caffeine to make it more interesting.