Scene cards
Scene cards contain the main content of your novel—the words you actually type. Scene cards appear throughout the boards, allowing you to view and manage them in a variety of ways, including cross-referencing your scenes for helpful insights.
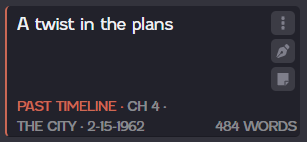 |
| Example of a scene card |
Scene cards display the title or description of the scene and word count along with tag information, if any are assigned to the scene, including the chapter the scene is in, the location assigned to the scene, and the date assigned to the scene. If you've tagged a scene with a color label, a band of the color displays on the left part of the scene card and the label displays in the color of the tag.
From a scene card, you can view a menu of options, edit the scene directly, or add a note to the scene.
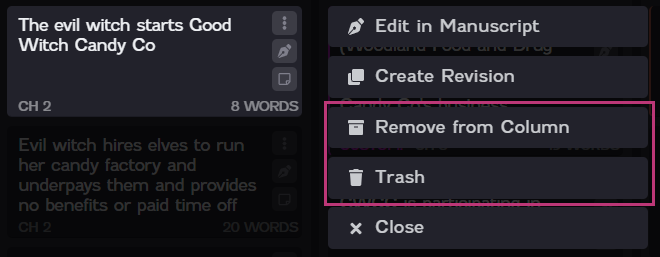
Click the Options icon ![]() on a scene card to display a menu of options that you can use to manage that scene.
on a scene card to display a menu of options that you can use to manage that scene.
The following options are available for a scene card.
| Option | Description |
|---|---|
Edit in Manuscript | Opens the scene to its location in the Manuscript. Note: This option only displays for a scene card that has been added to the Chapters board. |
| Create Revision | Opens the Revisions dialog, where you can create scene revisions. |
| Manage Revisions | Opens the Revisions dialog, where you can create, edit, or otherwise manage revisions for the scene. Note: This option only displays if revisions exist for the scene. |
| Promote Revision | "Promoting" a revision essentially means that you want the current revision to be the one revision that rules them all. Select this option to keep the current revision. Important: Promoting a revision deletes all other revisions. A confirmation dialog will display to confirm that you want to promote the revision and delete the other scene revisions. Note: This option only displays if revisions exist for the scene. |
| Remove from Column | Removes the scene from the current chapter. When you remove a scene from a chapter, the scene is stored in the archive, and you can re-insert it to any chapter at any time. |
| Trash | Moves the scene to the Trash. When you delete a scene, it is stored in the Trash but can still be reinserted if you decide you want it again later. |
| Close | Closes the Options menu. |
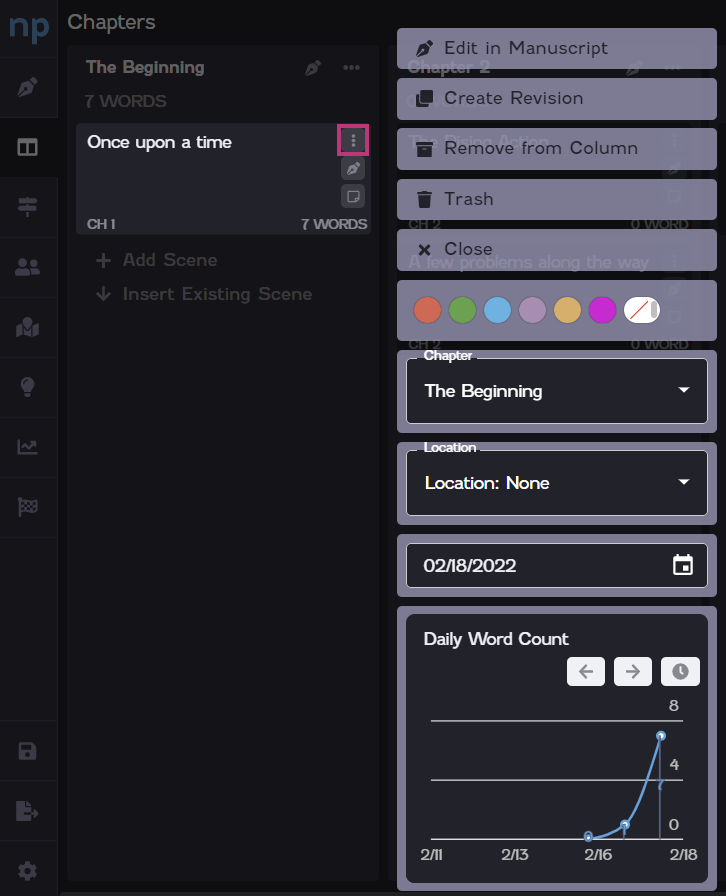
| Color Labels | Choose a color swatch to tag the scene with a color label. There are a handful of default color labels, but you can create your own custom color labels on the Settings screen. |
| Chapter | Moves the scene card to the selected chapter. This option is an alternative to dragging and dropping the scene card to another chapter. |
| Location | Tags the scene card with a location. You can then view your scene cards grouped by location on the Locations board. |
| Date | Tags the scene card with a date. This feature is helpful for keeping track of the timeline within your novel, which you can view on the Insights board. For example, you can tag a scene card with a date like 05/20/1990 if the scene is a flashback to the narrator remembering the day of her birth. |
Daily Word Count Daily Time Worked | Click the Number icon Click the Time icon On both charts, you can scroll backward or forward along the dates using the Arrow icons. |
There are multiple ways to view or edit a scene, depending on how much context you want. Sometimes you may want to focus on a single chunk of your text and other times you may want to work on a scene in view of the scenes around it.
You can view the contents of a scene in isolation or, rather, only the contents of that single scene.
To view a scene in isolation, click the Edit icon ![]() on the scene card. The Editor slides out from the side of the screen, where you can review or change your content.
on the scene card. The Editor slides out from the side of the screen, where you can review or change your content.
When you're done editing your scene, simply click anywhere outside of the Editor. Changes are automatically saved as you make them, so you can click away any time without losing any of your work.
You can view all of the scenes in a group, such as a chapter, plot line, or by character, if you want to edit the scenes with a little more context. In group context, you can view and edit all of the scenes in the group.
To view a scene in section context, click the Edit icon ![]() at the top of the group (such as a chapter card or a plot line card). The Editor slides out from the side of the screen, where you can review or change your content.
at the top of the group (such as a chapter card or a plot line card). The Editor slides out from the side of the screen, where you can review or change your content.
Each scene in the group will be separated by a line divider. For example, if you view a chapter that contains four scene cards on the Chapters board, the contents of all four scenes will display in the Editor. Scenes display on the Editor in the same order as their respective scene cards in the group card.
You can view all of the scenes in your novel by editing them in the Manuscript. The Manuscript is the compiled text of all of the chapters and scenes that you've added to the Chapters board.
To view a scene in your entire manuscript, click the Options icon ![]() on the screen card. Then click Edit in Manuscript on the menu that appears.
on the screen card. Then click Edit in Manuscript on the menu that appears.
You can rearrange the scene cards on the Chapters board or Plots board by simply dragging and dropping them into place.
To rearrange a scene card, click in an empty area on the scene card and drag the card to another location on the board. You can drag a scene card to another location in the same chapter/plot or you can drag it to a different chapter/plot.
You can also move a scene to a different chapter by selecting the chapter on the scene card's option menu. Click the Options icon ![]() on the scene card. On the menu that appears, select the chapter you want to move the scene to.
on the scene card. On the menu that appears, select the chapter you want to move the scene to.
Scene cards on other boards, such as the Locations board or Characters board, appear in certain sections automatically based on the details or tags of the scene. For example, if Daisy Buchanan is mentioned in a scene, that scene will automatically appear in the Daisy Buchanan card on the Characters board, if you've created one.
You can add notes to scenes to keep track of any sort of thought or additional details you want to associate with a scene, without needing to write that memo in the actual scene. For more information about using notes in NovelPad, refer to Notes.
Click the Note icon ![]() on a scene card to add a note to that scene. The Notes panel slides out from the right side of the screen, where you can add a note to the scene.
on a scene card to add a note to that scene. The Notes panel slides out from the right side of the screen, where you can add a note to the scene.
As you're writing, you may imagine a scene panning out in a few different ways. For example, perhaps you have multiple thoughts about how a conversation between your characters plays out, or maybe you want to try setting that conversation in several different settings or moods. With scene revisions, you can write all of those iterations down without creating clutter in a scene or chaos in your Manuscript. Scene revisions allow you to write multiple versions of the same scene while only having one version at a time in your novel. For more information about scene revisions, refer to Scene revisions.
To create a scene revision, click the Options icon ![]() on the scene card you want to create a revision for. Then click Create Revision on the menu that appears. The Revisions dialog opens, where you can create a scene revision.
on the scene card you want to create a revision for. Then click Create Revision on the menu that appears. The Revisions dialog opens, where you can create a scene revision.
We believe that everything you write is worth keeping. Therefore, scenes can never be completely deleted from your novel (you may want it back!). However, you may find that you no longer need a scene and want to remove it from your Manuscript or plot. In that case, there are two options: removing a scene from a card and deleting the scene. Removing a scene from a card sends the scene to the Archive, while deleting the scene sends the scene to the Trash.
To remove a scene from a card, click the Options icon ![]() on the scene you want to remove. Then click Remove from Column on the menu that appears. The scene will be sent to the Archive.
on the scene you want to remove. Then click Remove from Column on the menu that appears. The scene will be sent to the Archive.
To delete a scene (or send it to the Trash), click the Options icon ![]() on the scene you want to delete. Then click Trash on the menu that appears. The scene will be sent to the Trash.
on the scene you want to delete. Then click Trash on the menu that appears. The scene will be sent to the Trash.
In either case, you can always re-insert your scene into your Manuscript or Plot board at any time.