Plots
The Plots board is where you can organize and manage these scenes in your novel independently of the Chapters board and the Manuscript. Think of the Plots board like a bulletin board where you can group, pin, and arrange your scenes however you want. Where the Chapters board is useful for arranging your scenes into chapters and creating the chronology of your novel, the Plots board can be useful for tracking the scenes in your main plot and your side plots. You could also use the Plots board for tracking the scenes you haven't yet added to your novel. The board, like your novel, is limited only by your imagination!

Plot cards
A plot card is a group of scene cards that can help you organize your plots at a higher level. You can use plot cards to group your scene cards any way you like. For example, you can use the board to sort out your plot lines, such as your main plot from your side plots. Or you might choose to group your scenes based on locations and characters, such as "Scenes in the mine shaft" or "Possible investigator back story plot". How you group your scene cards and what you name your plot cards is entirely up to you.
To add a new plot card to the Plots board, click Add Plot at the end of your plot card list. A new plot card will appear, where you can enter the name of the plot card. Click Add to add the plot card.
The new plot card will be added to the end of your plot card list, and you can rearrange it on the Plots board as needed.
You need to give your new plot card a title. If you click away or press Enter without entering a title, the plot card will not be added.

If you need to rename a plot card, you can do so at any time.
To rename a plot card, click the title of the plot card. The plot card title will become editable. Enter the new plot name, and then press Enter to save the new title.
You can also edit the title of a plot card by clicking the Edit Plot icon ![]() at the top of the card. The Edit Plot dialog will open, and you can edit the plot card title in the Title field.
at the top of the card. The Edit Plot dialog will open, and you can edit the plot card title in the Title field.
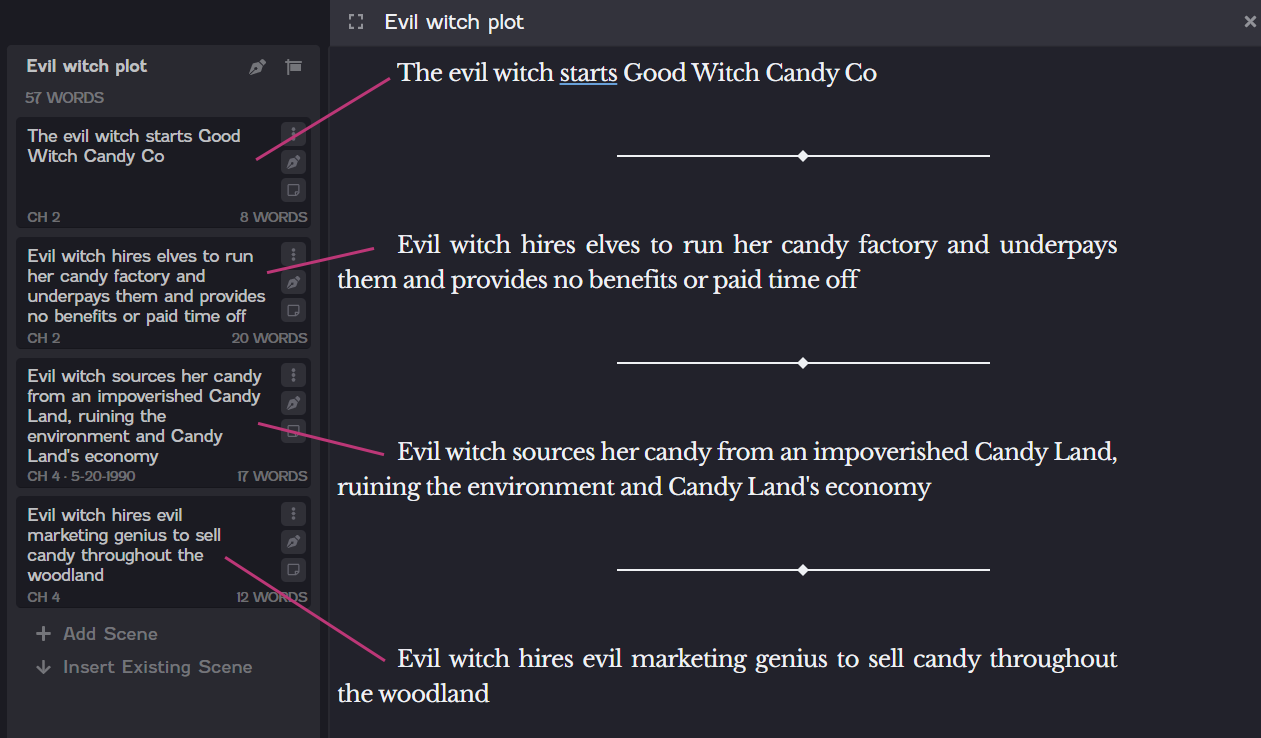
You can view the entire contents of a plot by clicking the Edit icon ![]() at the top of the plot card. The plot contents will display in the Editor and will include all of the scenes in the plot card, each separated by a line divider. For example, if you view a plot that contains four scene cards on the Plots board, the contents of all four scenes will display in the Editor view.
at the top of the plot card. The plot contents will display in the Editor and will include all of the scenes in the plot card, each separated by a line divider. For example, if you view a plot that contains four scene cards on the Plots board, the contents of all four scenes will display in the Editor view.
Any changes you make in the Editor view will apply to the individual scene you made the change in. So let's say you added a new paragraph in the Editor view and that paragraph was in the first scene (in this case, the first section before the first line divider). If you then view that scene on its scene card or anywhere else in NovelPad, such as the Manuscript, the new paragraph will be there.
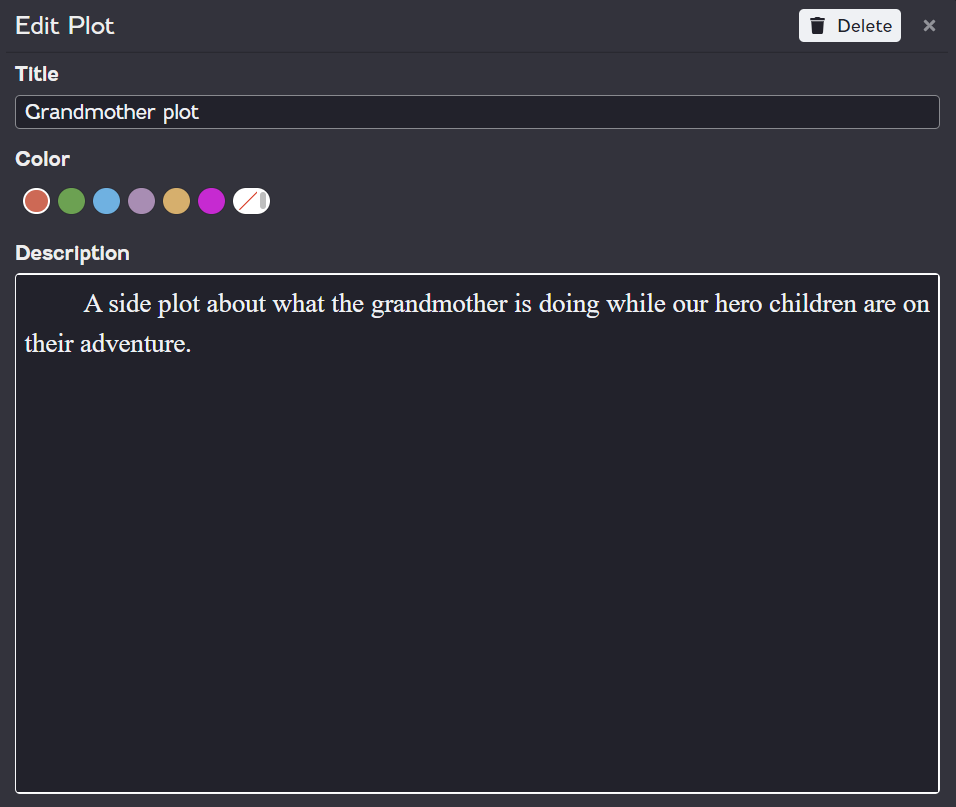
You can also edit plot card information on the Edit Plot dialog. To access the Edit Plot dialog, click the Edit Plot icon ![]() at the top of the plot card. You can edit the following information for a plot card.
at the top of the plot card. You can edit the following information for a plot card.
Title. Edit the title for the plot card.
Color. Select a color label for the plot card. This applies the color label to each scene card in the plot.
Description. Enter a description for the plot.
When you delete a plot card on the Plots board, the scenes in that plot card are removed from the Plots board but are not completely deleted from your novel. Instead, the plot card is removed from the Plots board, and the scenes in that plot are archived, allowing you to add them back if you regret your decision or simply deleted them by mistake.
To delete a plot card, click the Edit icon ![]() at the top of the plot card. The Edit Plot dialog will open. Click Delete on the Edit Plot dialog. Then click Okay on the confirmation dialog that appears.
at the top of the plot card. The Edit Plot dialog will open. Click Delete on the Edit Plot dialog. Then click Okay on the confirmation dialog that appears.

Scene cards
A scene card is a smaller level of organization that is useful for dividing your story into the individual scenes that make up a chapter. However, you can use scene cards to contain any amount of content you wish, from a single sentence to an entire magnum opus. Scenes can be edited and managed separately. There are several ways to edit the content of a scene.
Scene cards that exist on the Plots board are not included in your Manuscript unless they are also on the Chapters board. Scene cards that are only located on the Plots board will not appear in your Manuscript. The same scene card can exist on both the Plots board and the Chapters board. For more information about the differences between the Plots board and the Chapters board, refer to What's the difference between the Plots board and the Chapters board?
To add a new scene card to a plot, click Add Scene at the bottom of a card. A new scene card will appear, and you can enter the name of the scene. Click Add to add the scene card.
The new scene card will be added to the end of the list of scenes in the plot, and you can rearrange it on the Plots board as needed. How you title the scene card is up to you. Some writers prefer short identifiers such as "Nick moves to West Egg," while other writers prefer longer descriptions of the details of their scene.
An existing scene is a scene that exists on the Chapters board or in the archive and is not already in a plot card on the Plots board. This is the easiest way to "import" scenes from your Chapters board to arrange them on your Plots board.
To add an existing scene to a plot card, click Insert Existing Scene. A dialog will appear, where you can search for the scene you want to add. For more information about searching for an existing scene, refer to Search for an existing scene below. On the dialog, simply click a scene to add that scene to the plot card.
The same scene card can be added to multiple plot cards.
When you click Insert Existing Scene on the Plots board, a dialog will appear, where you can search for the scene you want to add. By default, all of the scenes that exist in the archive or on the Chapters board appear in the Results list. If you have a lot of existing scenes, you can search using several different criteria. You can use any search criteria in combination with other search criteria. For example, you can search for a scene by both title and color.
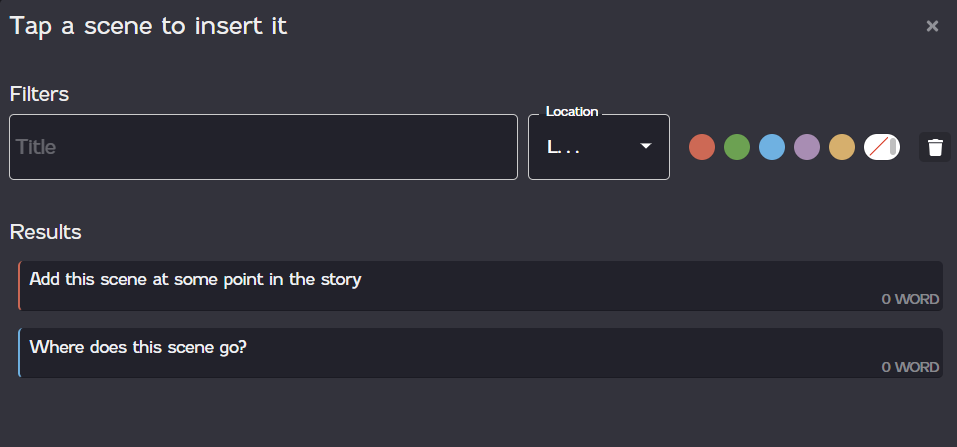
Filter scenes by title. To search for a scene by title, enter a keyword or two in the Filters field. Scenes with titles matching the keywords will appear in the Results list. For example, enter "Jordan" to find scenes with titles such as "Jordan tells Nick that Gatsby is in love with Daisy" or "Jordan plays golf".
Search for scenes by location. To search for a scene by location, click the Location drop-down. Then select a location from the list. Scenes that have been tagged using the selected location appear in the Results list.
Search for scenes by color. To search for a scene by color, click a color tag. Any custom colors you have added will also appear in the selector. Scenes that have been tagged using the selected color will appear in the Results list. Click the Clear Color icon
 to clear a color selection.
Look through deleted scenes. Click the Trash icon
 to look for deleted scenes in the trash. All deleted scenes will appear in the Results list when you click the Trash icon , but you can also use the other criteria to search for scenes in the trash.
If you need to rename a scene, you can do so at any time.
To rename a scene, click any area on the scene card. The scene card title will become editable. Enter the new scene name, and then press Enter to save the new title.
You can view the entire contents of a scene card by clicking the Edit icon ![]() at the side of the card. The scene contents will display in the Editor and you can add text or make changes, as needed.
at the side of the card. The scene contents will display in the Editor and you can add text or make changes, as needed.
As you write content, there are some helpful options for formatting and correcting happy mistakes.
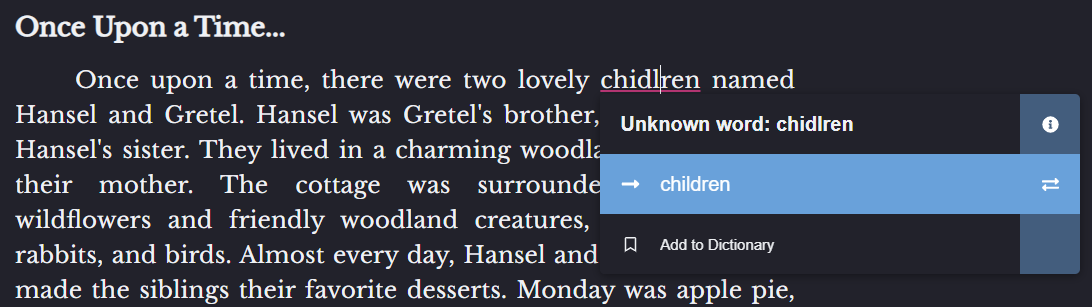
By default, ProWritingAid integration is enabled, which provides suggestions for spelling, grammar, and style. You can turn this integration off on the Settings screen.
To access the suggestions, left-click an underlined word. Then select the suggestion you'd rather use. For example, if you've misspelled a word, you can select the correct word from the list, or you can tell the dictionary you did it on purpose and add the word to your novel's dictionary.
The dictionary applies to all novels you've created in NovelPad. Any word you add to the dictionary in one novel will not count as a misspelled word in another novel.
The text editor also includes a pop-up menu that contains a variety of formatting options, including bold, justification, block quote, heading styles, and highlight. The pop-up menu also displays the number of words in the scene your cursor is currently in and the number of words you've selected.
To access the formatting options, highlight a selection of text. The menu automatically displays.

If you or an editor have added comments to a scene, you can hide the comments in the editor.
To hide comments, click the Hide Comments icon ![]() on the menu at the top of the editor. Click the icon again to show comments.
on the menu at the top of the editor. Click the icon again to show comments.

You can choose to display or hide any highlights in your text, which can make your text easier to read, as needed.
To hide highlights, click the Hide Highlights icon ![]() on the menu at the top of the editor. Click the icon again to show higlights.
on the menu at the top of the editor. Click the icon again to show higlights.

If you're a minimalist or just get easily distracted, you can disable the formatting menu from appearing when you highlight text. When the formatting menu is disabled, you can still use shortcut keys (such as Ctrl+B) to format your text.
To disable the formatting menu, click the Disable Formatting Dropdown icon ![]() on the menu at the top of the editor. Click the icon again to enable the formatting menu.
on the menu at the top of the editor. Click the icon again to enable the formatting menu.

We believe that everything you write is worth keeping. Therefore, scenes can never be completely deleted from your novel (you may want it back!). However, you may find that you no longer need a scene and want to remove it from your Manuscript or plot. In that case, there are two options: removing a scene from a card and deleting the scene. Removing a scene from a card sends the scene to the Archive, while deleting the scene sends the scene to the Trash.
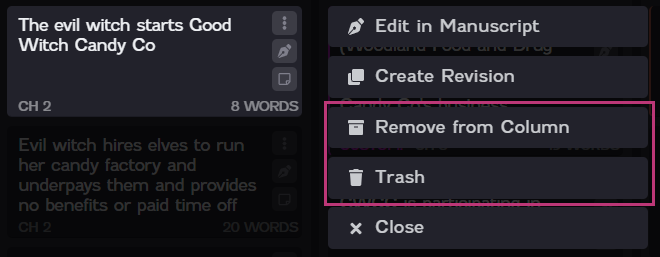
To remove a scene from a card, click the Options icon ![]() on the scene you want to remove. Then click Remove from Column on the menu that appears. The scene will be sent to the Archive.
on the scene you want to remove. Then click Remove from Column on the menu that appears. The scene will be sent to the Archive.
To delete a scene (or send it to the Trash), click the Options icon ![]() on the scene you want to delete. Then click Trash on the menu that appears. The scene will be sent to the Trash.
on the scene you want to delete. Then click Trash on the menu that appears. The scene will be sent to the Trash.
In either case, you can always re-insert your scene into your Manuscript or Plot board at any time.
Organize the Plots board
You can organize the overall layout of the Plots board to suit your needs, including the orientation of the board and the order of your plot cards and scene cards. You can also filter plots and scene cards to quickly locate certain parts of your novel based on keywords.
You can switch the orientation of the Plots board between a horizontal layout and a vertical layout using the Orientation icon at the top of the board. Note that the look of the icon will change based on the current layout.
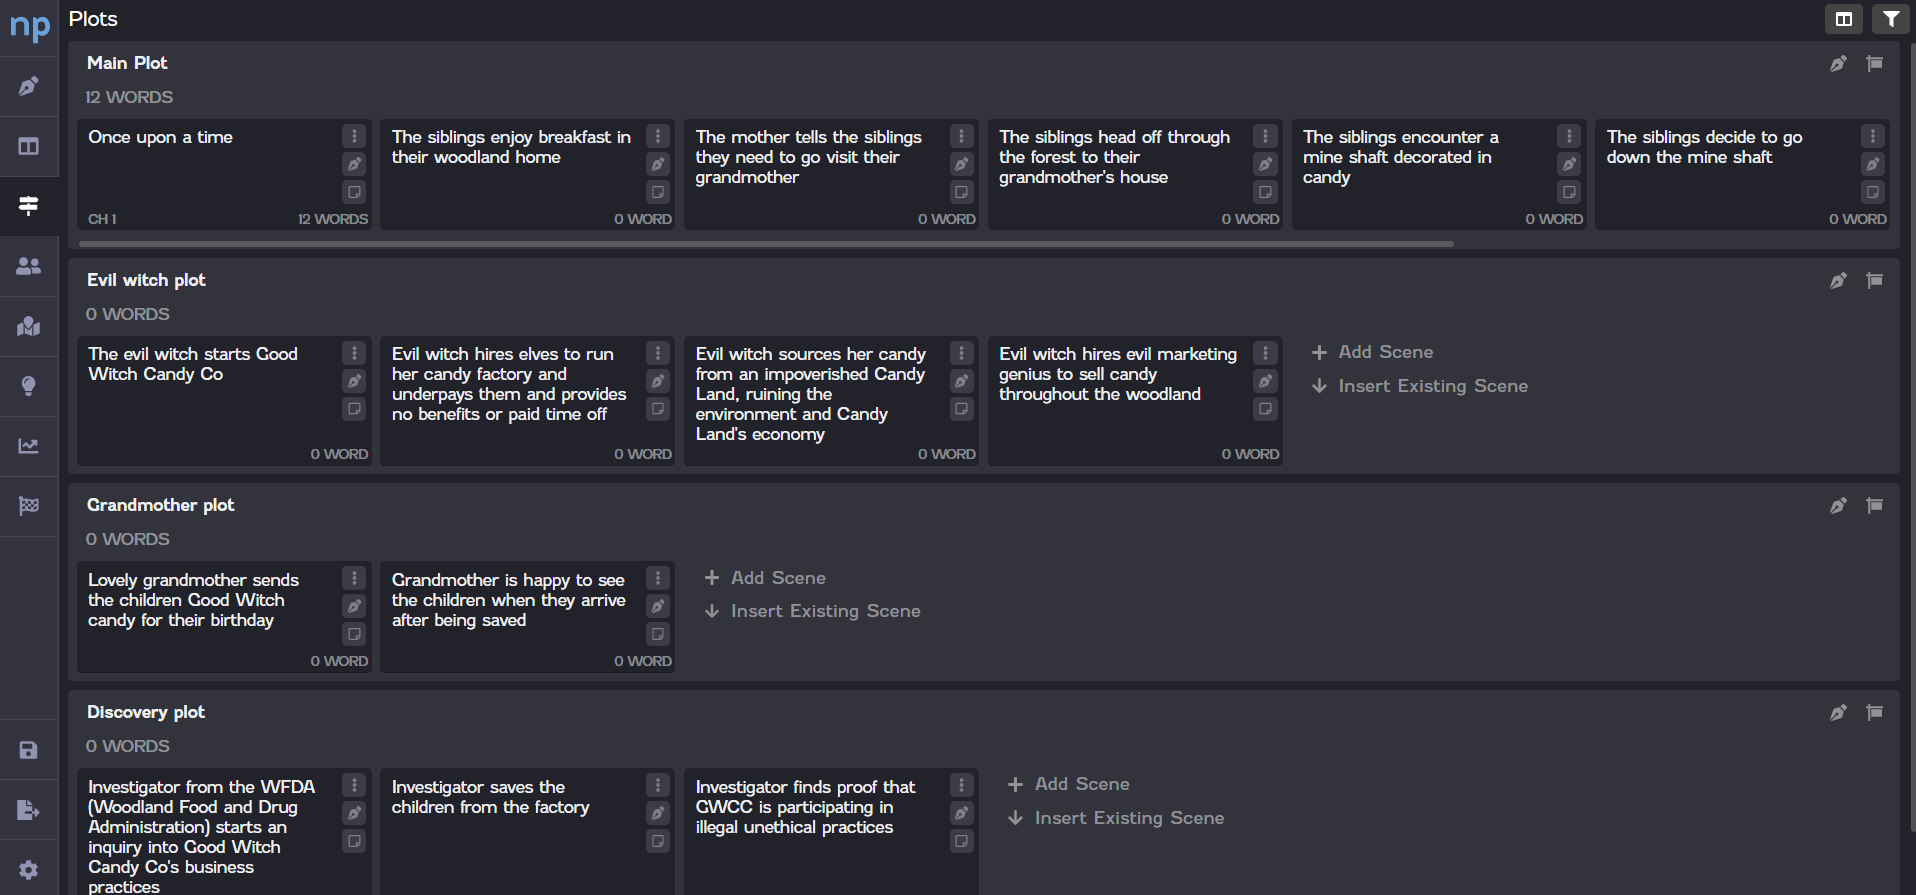
To switch to a horizontal layout, click the Horizontal Orientation icon ![]() at the top of the board.
at the top of the board.
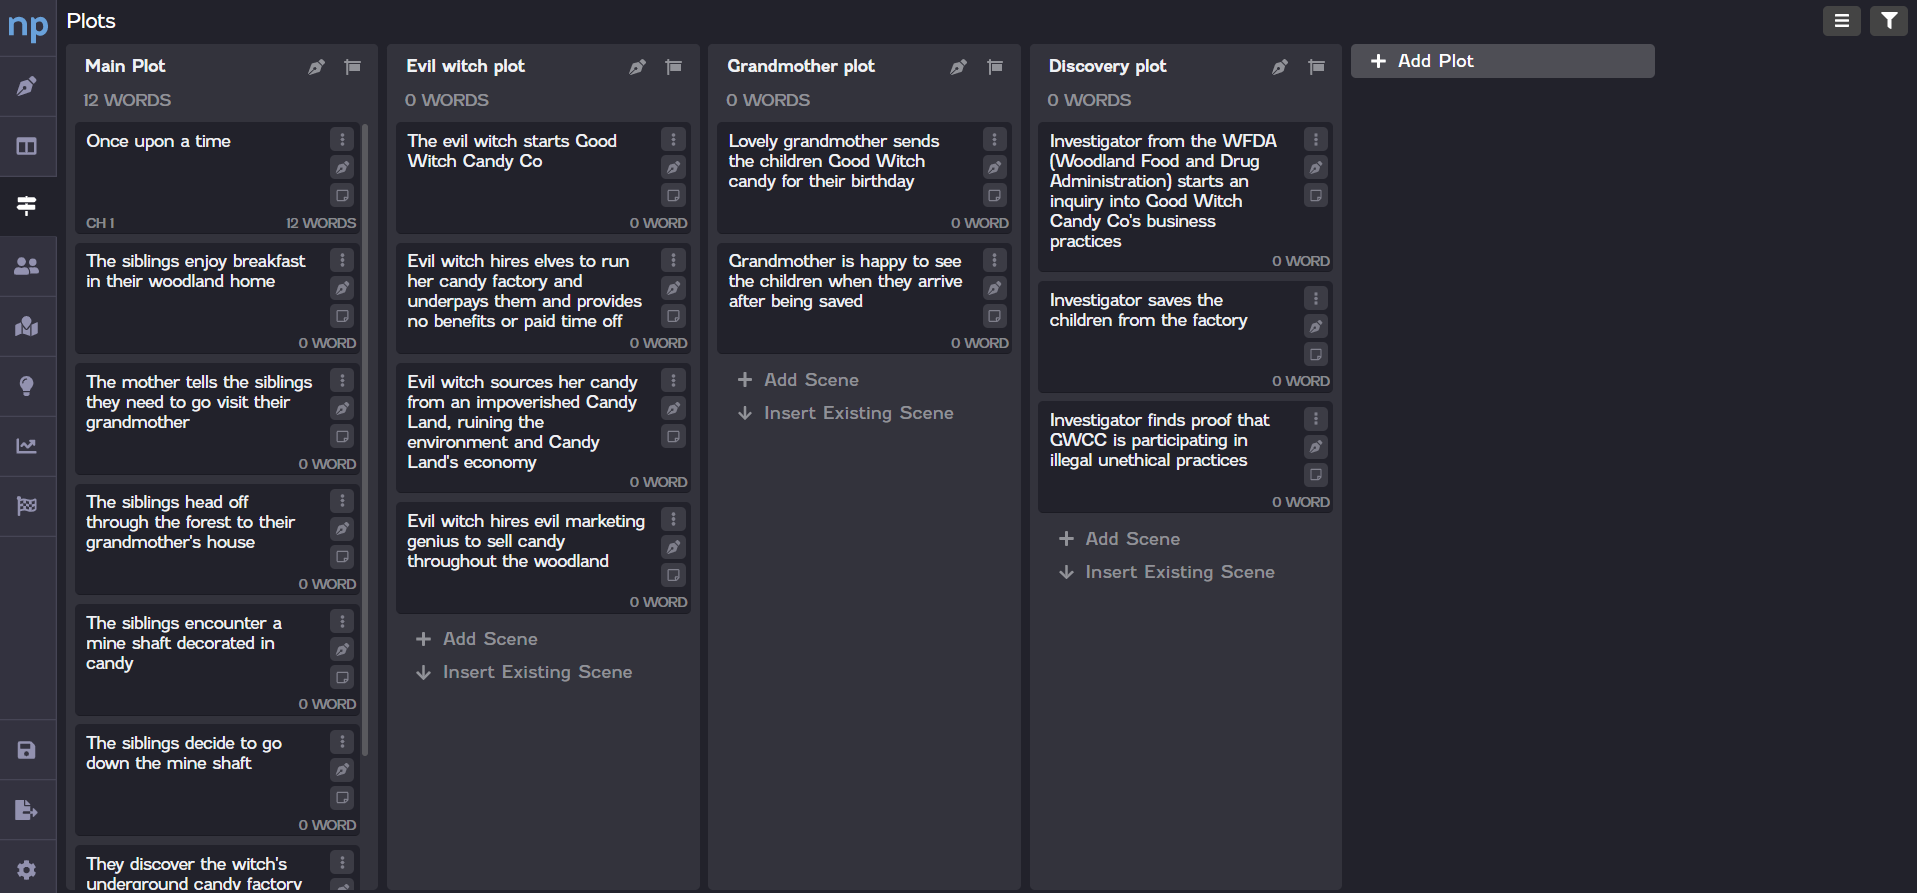
To switch to a vertical layout, click the Vertical Orientation icon ![]() at the top of the board.
at the top of the board.
The functionality of each layout is the same, so you can select your orientation purely on preference.
 |  |
| Vertical orientation | Horizontal orientation |
You can rearrange the plot and scene cards on the Plots board by simply dragging and dropping them into place.
To rearrange a plot card, click in an empty area in the plot heading and drag the plot to another location on the board.
To rearrange a scene card, click in an empty area on the scene card and drag the card to another location on the board. You can drag a scene card to another location in the same plot card or you can drag it to a different plot card.
Rearranging plot or scene cards on the Plots board does not change the order of the scenes on the Chapters board or your Manuscript.
 |  |
| Rearrange a plot card | Rearrange a scene |
If you have a lot of plot cards, you may find it easier to use the filter to quickly find a plot rather than needing to scroll through your entire list.
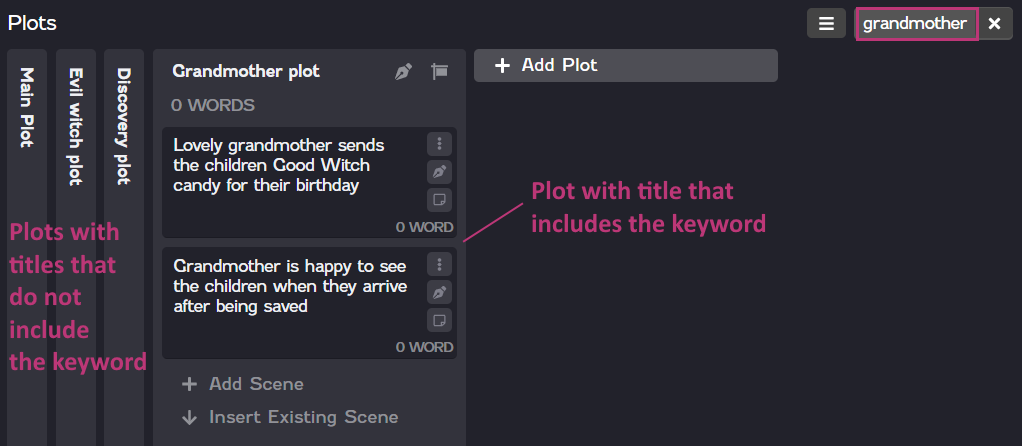
To search for a plot using the filter, click the Filter icon ![]() at the top of the Plots board. Then enter a keyword in the field. Plot cards with titles that include the keyword will stay expanded, while plot cards that do not include the keyword will collapse.
at the top of the Plots board. Then enter a keyword in the field. Plot cards with titles that include the keyword will stay expanded, while plot cards that do not include the keyword will collapse.